患者の前腕の形に合わせた3Dプリント製ギプス(cast)の設計。従来のギプスの欠点を、設計でどう解決するかを考える章である。
見た目の格好よさで決まるものではない。固定という機能を満たしているかが第一である。
- 3Dプリント製ギプスの設計要件
- 印刷の準備 — Z-SUITE で決めること
3Dプリント製ギプスの設計要件
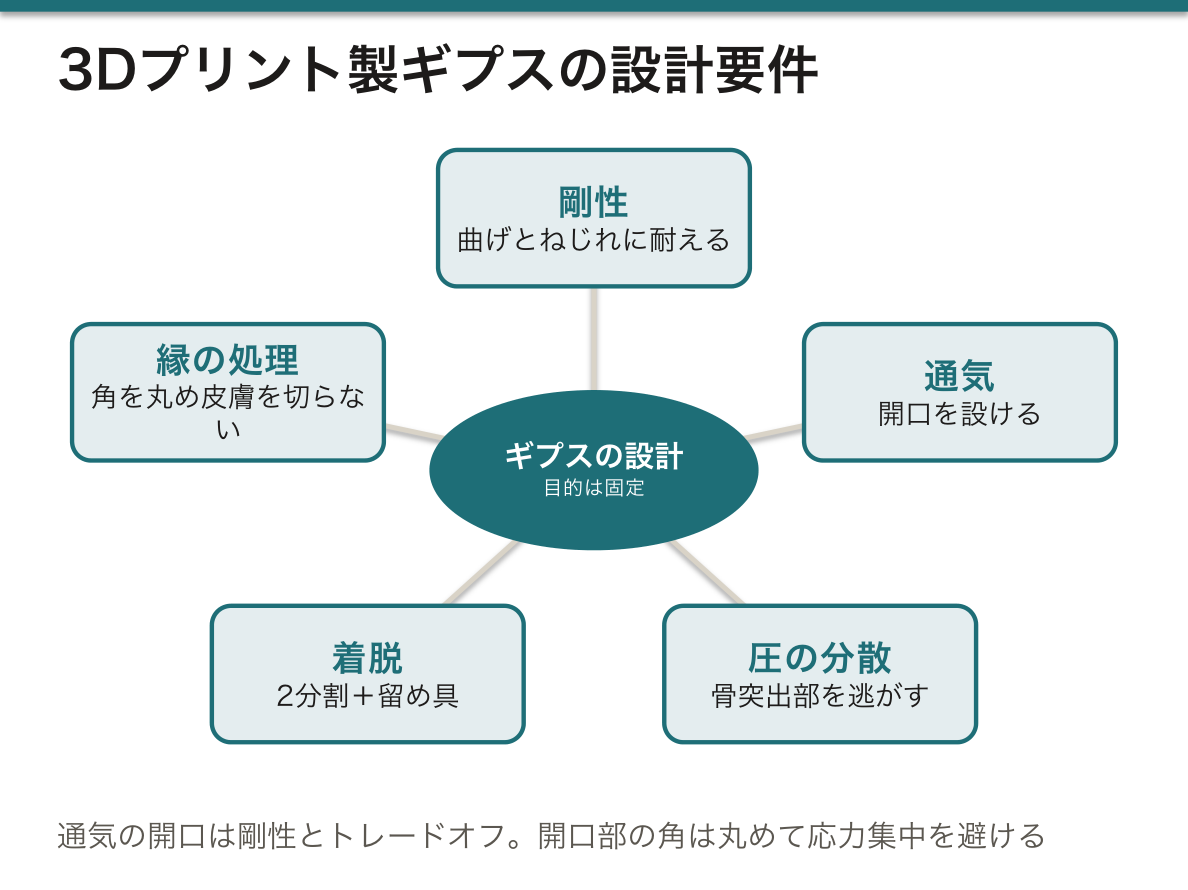
ギプスの目的は「固定」——骨折部を整復位に保ち、隣接関節を含めて動きを止めること。3Dプリント製でもこれは変わらない。
従来のギプスの問題:重い・蒸れる・洗えない・皮膚がかゆい・X線を通しにくい・水に濡らせない・調整できない。
設計で満たすべき要件:
- 剛性——曲げとねじれに耐える(薄くしすぎない、格子の向きを考える)
- 通気——開口を設ける(が、剛性とのトレードオフ)
- 圧の分散——骨突出部(橈骨茎状突起・尺骨頭)を逃がす
- 着脱——2分割+留め具(腫脹の変化に対応する)
- 縁の処理——角を丸め、皮膚を切らない
最大の危険はコンパートメント症候群である。受傷直後は腫脹が進むので、密着した閉鎖構造は禁忌になる。従来のギプスでも初期はシーネ(半周固定)にするのはこのためで、3Dプリント製は「型を取ってから作る」ので、そもそも受傷直後には使えない。適応は「腫脹が引いた後の交換用」と考えるのが現実的で、これを説明できるかどうかが理解の分かれ目になる。
格子(lattice)は軽量化のためだけではない。穴の配置は応力の流れに沿わせる必要がある。単純な均一メッシュでは、開口の縁に応力が集中して割れる。開口部の角は必ず丸める(応力集中を避ける)。
骨突出部の圧迫は褥瘡を作る。スキャンデータをそのままオフセットすると、突出部で最も密着してしまう。局所的に隙間(relief)を設けるのが定石で、これは義肢ソケットの設計(下肢装具の設計)と共通の原則である。
材料と滅菌:PLA は安価だが熱に弱く(60℃前後で変形)、車内や熱いシャワーで変形しうる。PETG やナイロンのほうが実用的。皮膚に長期間接触するので、生体適合性の確認された材料を使う。
X線透過性は3Dプリント製の明確な利点である。整復位の確認をギプスを外さずに行える——従来法にない機能なので、設計の利点として挙げる価値がある。
English version
Core
The purpose of a cast is immobilisation — holding the fracture in the reduced position and stopping movement including the adjacent joints. This does not change because it is 3D printed.
The problems of a conventional cast: heavy, hot and damp, cannot be washed, itchy skin, poorly transparent to X-rays, cannot be wetted, cannot be adjusted.
The requirements the design must meet:
- Rigidity — it must resist bending and torsion (do not make it too thin; consider the orientation of the lattice).
- Ventilation — provide openings (a trade-off against rigidity).
- Distribution of pressure — relieve the bony prominences (the radial styloid, the head of the ulna).
- Application and removal — two halves plus fasteners (to allow for changing swelling).
- Finishing the edges — round the corners; do not cut the skin.
Going further
The greatest danger is compartment syndrome. Swelling advances immediately after injury, so a closely fitting closed structure is contraindicated. This is why a conventional cast is a backslab at first, and a 3D-printed one, being "made after taking a mould", cannot be used immediately after injury at all. The realistic indication is "as a replacement once the swelling has settled", and whether this can be explained is what divides understanding.
The lattice is not only for lightness. The arrangement of the holes must follow the flow of stress. With a simple uniform mesh, stress concentrates at the edge of an opening and it cracks. Always round the corners of an opening (to avoid stress concentration).
Pressure on a bony prominence creates a pressure sore. Offset the scan data uniformly and the fit is closest exactly at the prominence. Providing a local relief is the standard solution, and this is a principle shared with the design of prosthetic sockets (leg brace design).
Material and sterilisation: PLA is cheap but weak to heat (it deforms around 60 °C) and can deform in a car or a hot shower. PETG or nylon is more practical. Since it is in long contact with skin, use a material of confirmed biocompatibility.
Transparency to X-rays is a clear advantage of the printed cast — the reduction can be checked without removing it, a function the conventional method does not have, and worth raising as an advantage of the design.
印刷の準備 — Z-SUITE で決めること
作った STL は、そのままでは印刷できない。Z-SUITE(Zortrax 用のスライサ)で機械の言葉に翻訳する。
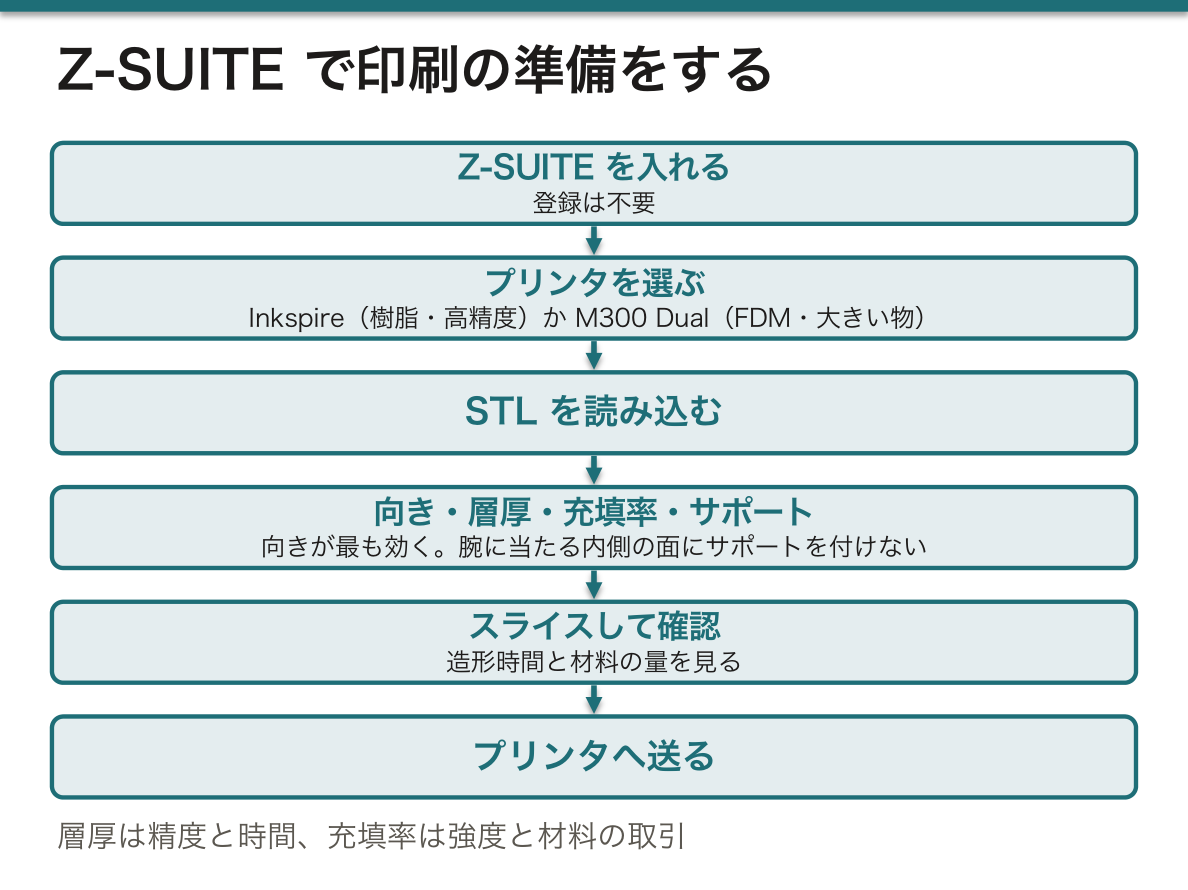
手順——①Z-SUITE を入れる(登録は不要)②プリンタを選ぶ——Inkspire(樹脂・高精度)か M300 Dual(FDM・大きい物)。材料と大きさで決める ③STL を読み込む ④向き・層厚・充填率・サポートを決める ⑤スライスして造形時間と材料量を確認 ⑥プリンタへ送る。
向きが最も効く——①層に平行な方向が弱いので、力のかかる向きに層を重ねない ②サポートが接した面は荒れるので、見せたい面・当たる面を下にしない ③断面積が小さい向きほど速い。ギプスなら「腕に当たる内側の面を、サポートの付かない向きにする」のが判断。
層厚は精度と時間の取引——薄いほど滑らかで遅い。充填率は強度と材料の取引。
印刷の前に STL が閉じているか(watertight)、面の向きが揃っているか、自己交差が無いかを確認する。壊れた STL はスライサが勝手に埋めるので、意図しない形になる。
English version
Core
An STL cannot be printed as it is. Z-SUITE (the slicer for Zortrax) translates it into the language of the machine.
The procedure — ① install Z-SUITE (no registration needed) ② choose the printer — Inkspire (resin, high accuracy) or M300 Dual (FDM, larger objects). Decided by material and size. ③ load the STL ④ set orientation, layer height, infill and supports ⑤ slice and check the build time and the amount of material ⑥ send it to the printer.
Orientation tells most — ① it is weak in the direction parallel to the layers, so do not stack layers across the line of force ② surfaces touched by supports are rough, so do not put the face that will be seen or that bears on the skin downwards ③ the smaller the cross-section in the build direction, the faster. For a cast, "put the inner surface that touches the arm in an orientation where no support attaches" is the judgement.
Layer height is a trade of accuracy against time — thinner is smoother and slower. Infill is a trade of strength against material.
Going further
Before printing, check that the STL is closed (watertight), that the face normals are consistent, and that there are no self-intersections. A broken STL is filled in by the slicer on its own, giving an unintended shape.
まとめ
| 3Dプリント製ギプスの設計要件 | ギプスの目的は「固定」——骨折部を整復位に保ち、隣接関節を含めて動きを止めること。 |
|---|---|
| 印刷の準備 — Z-SUITE で決めること | 作った STL は、そのままでは印刷できない。 |
このノートは医学生が授業の内容を自分の言葉でまとめたもので、診療の判断に使うものではありません。誤りに気づいたらお知らせください。